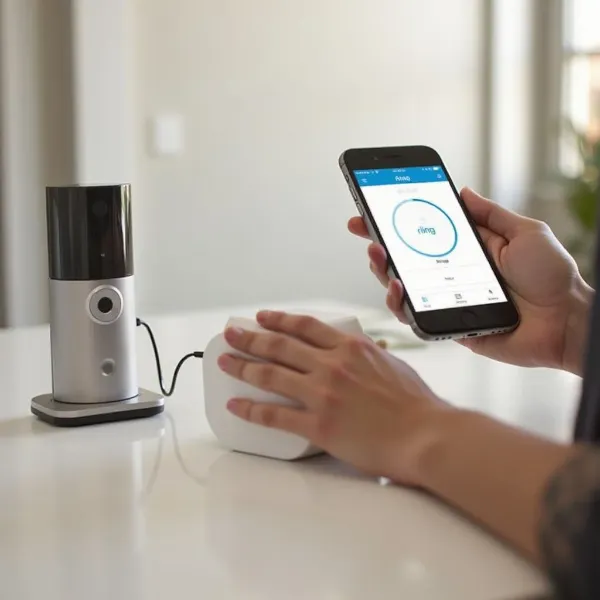
Installing a Ring doorbell is a simple and effective way to boost your home security. With just a few easy steps, you’ll be able to monitor your door from anywhere. Whether you’re installing a battery-powered or hardwired model, this guide will walk you through everything you need to know about how to install a Ring doorbell. Let’s dive into the setup!

Getting Started with Your Ring Doorbell
Before we get into the installation process, let’s cover the basics. Setting up your Ring doorbell may sound like a lot of work, but it’s actually pretty simple. Whether you're going for a battery-powered model or hooking up a hardwired one, the steps are straightforward. Once everything’s in place, you’ll be able to keep an eye on your front door without missing a beat.
Why It’s Important
A properly installed Ring doorbell provides peace of mind by giving you real-time video and audio of whoever is at your door. Not only does it enhance security, but it also helps you keep track of deliveries or unexpected visitors, all from the convenience of your phone.
Part 1: App Setup & Charging
Before getting into the physical installation, you'll need to set up the Ring app and charge your doorbell (if needed). Here's how to do that in a few simple steps.
Step 1 – Download the Ring App
To start the setup, you’ll need the Ring app on your phone. Here’s how:
- Download the app from the App Store (for iPhone) or Google Play Store (for Android).
- Create an account if you’re new, or just log in to your existing Ring account.
This app will be your main hub for controlling your doorbell, so make sure it’s ready to go before moving forward.
Step 2 – Charge Your Doorbell (For Battery Models)
For battery-powered models, you’ll need to charge the device before installing it:
- Plug in the USB-C cable that came with your Ring doorbell.
- Wait until the battery is fully charged before continuing (this might take a couple of hours).
Once the battery’s ready, you’re good to go.
Step 3 – Start Setup in the Ring App
With the app downloaded and the battery charged (if applicable), it's time to begin the setup:
- Open the Ring app.
- Tap “Set Up a Device” and choose “Doorbells” from the list.
- Follow the instructions on the screen to kick off the setup.
The app will walk you through every step, so you can’t go wrong.
Step 4 – Scan the QR Code
Each Ring doorbell has a unique QR code that links it to your account. To scan it:
- Flip your doorbell over and find the QR code on the back.
- In the app, tap “Scan QR Code” and point your phone’s camera at the code.
Once scanned, your doorbell will be connected to your account and ready to go!
Part 2: Physical Installation (Choose Battery or Hardwired)
Now that the app setup is complete, it’s time to install the doorbell itself. You’ll need to decide if you’re installing a battery-powered model or a hardwired model since the steps for each vary slightly.
For Battery Models:
Battery-powered models are easy to install and don’t require wiring. Here’s how to mount it:
Step 1 – Find the Right Spot
When choosing a location for your doorbell, keep these things in mind:
- Mount it about 4 feet from the ground for the best view and sound quality.
- If you’re replacing an old doorbell, simply use the same spot.
Step 2 – Mount the Bracket
The first thing you’ll need to do is attach the mounting bracket:
- Mark where the screws will go, and then drill the holes.
- If you’re mounting on brick or stucco, be sure to use anchors for extra support.
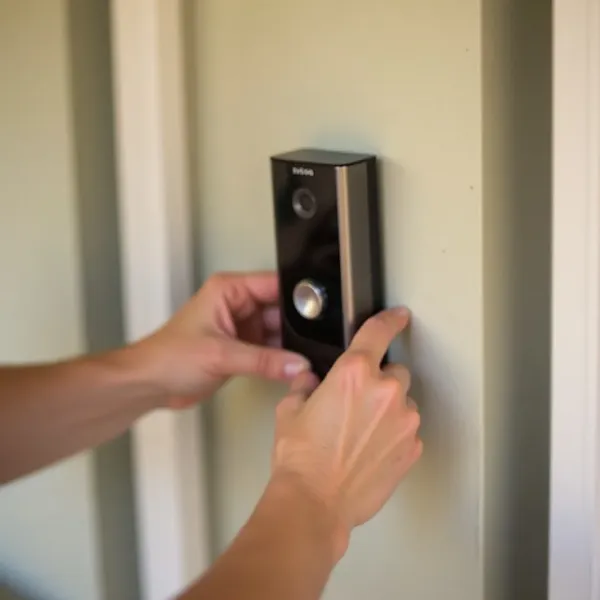
Step 3 – Attach the Doorbell
Now it’s time to attach the Ring doorbell to the bracket:
Place the top of the doorbell onto the bracket, and gently press down on the bottom until it clicks into place.
Step 4 – Secure the Doorbell
To make sure your doorbell stays put:
Tighten the security screw located at the bottom of the device.
This will prevent anyone from tampering with your doorbell.
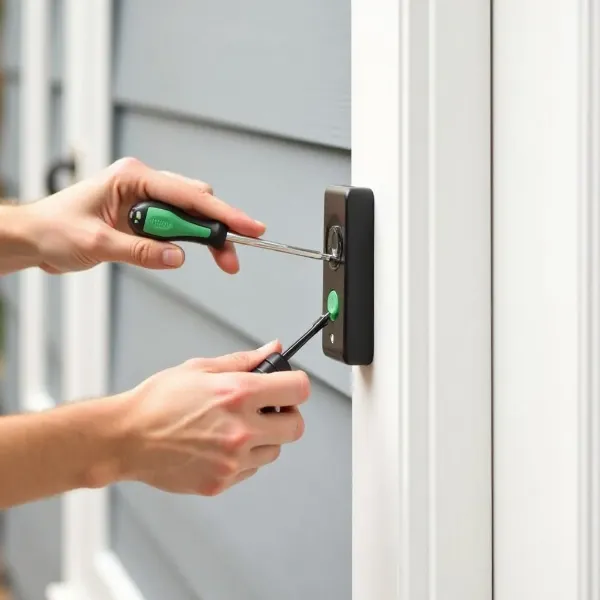
For Hardwired Models:
If you’re going with a hardwired model, you’ll be connecting the doorbell to your home’s existing wiring. Here’s how to do it:
Step 1 – Turn Off the Power
Safety first! Before working with electrical components, be sure to:
Turn off the power to your existing doorbell at the circuit breaker.
Step 2 – Remove the Old Doorbell
If you’re replacing an old doorbell:
Unscrew the old unit and carefully pull out the wires.
Step 3 – Mount the Bracket
With the old doorbell removed, you can now install the Ring bracket:
- Feed the wires through the back of the bracket.
- Use screws to secure the bracket to the wall (and anchors if necessary).
Step 4 – Connect the Wires
Now connect the wires to your Ring doorbell:
Wrap the wires around the screws on the back of the doorbell.
Step 5 – Attach the Doorbell
Now that the wires are connected, it’s time to attach the doorbell:
Snap the top of the doorbell into place first, then press the bottom until it clicks.
Step 6 – Restore Power
Finally, it’s time to restore power:
- Flip the circuit breaker back on to turn the power back on.
- Ensure that the doorbell powers up and the light comes on.
Part 3: Final Steps
Once the physical installation is done, you’ll need to finish setting everything up in the app and test your doorbell to make sure it works.
Step 1 – Complete the Setup in the App
After installation, the app will guide you through a few more steps:
- Follow the prompts to connect your doorbell to your Wi-Fi network.
- Set up your notification preferences to decide when and how you want to be alerted.
Step 2 – Test the Doorbell
With everything set up, it’s time to test the system:
- Press the doorbell button and check that the video and audio are working.
- Make sure you get notifications and that the video feed is clear.
Troubleshooting: Common Issues During Installation
Sometimes, things don’t go as planned. Here are some common issues and how to troubleshoot them.
No Power After Installation?
- Double-check that the power is on (for hardwired models) or that the battery is fully charged (for battery-powered models).
- For hardwired models, make sure the wires are properly connected.
Weak Wi-Fi Signal?
- Ensure your Wi-Fi signal is strong where your doorbell is installed.
- If the signal is weak, you might need a Wi-Fi extender to improve the connection.
Trouble Mounting on Stucco or Brick?
For walls like stucco or brick, use masonry anchors to securely attach the bracket.
For more home security tips, check out our guide on how to secure your home.
Conclusion: Enjoy Your New Ring Doorbell
And there you have it—your new Ring doorbell is installed and ready to use! Whether you chose a battery-powered or hardwired model, the setup process is straightforward when you follow these steps. Now you can enjoy enhanced security and peace of mind, all from the convenience of your phone.